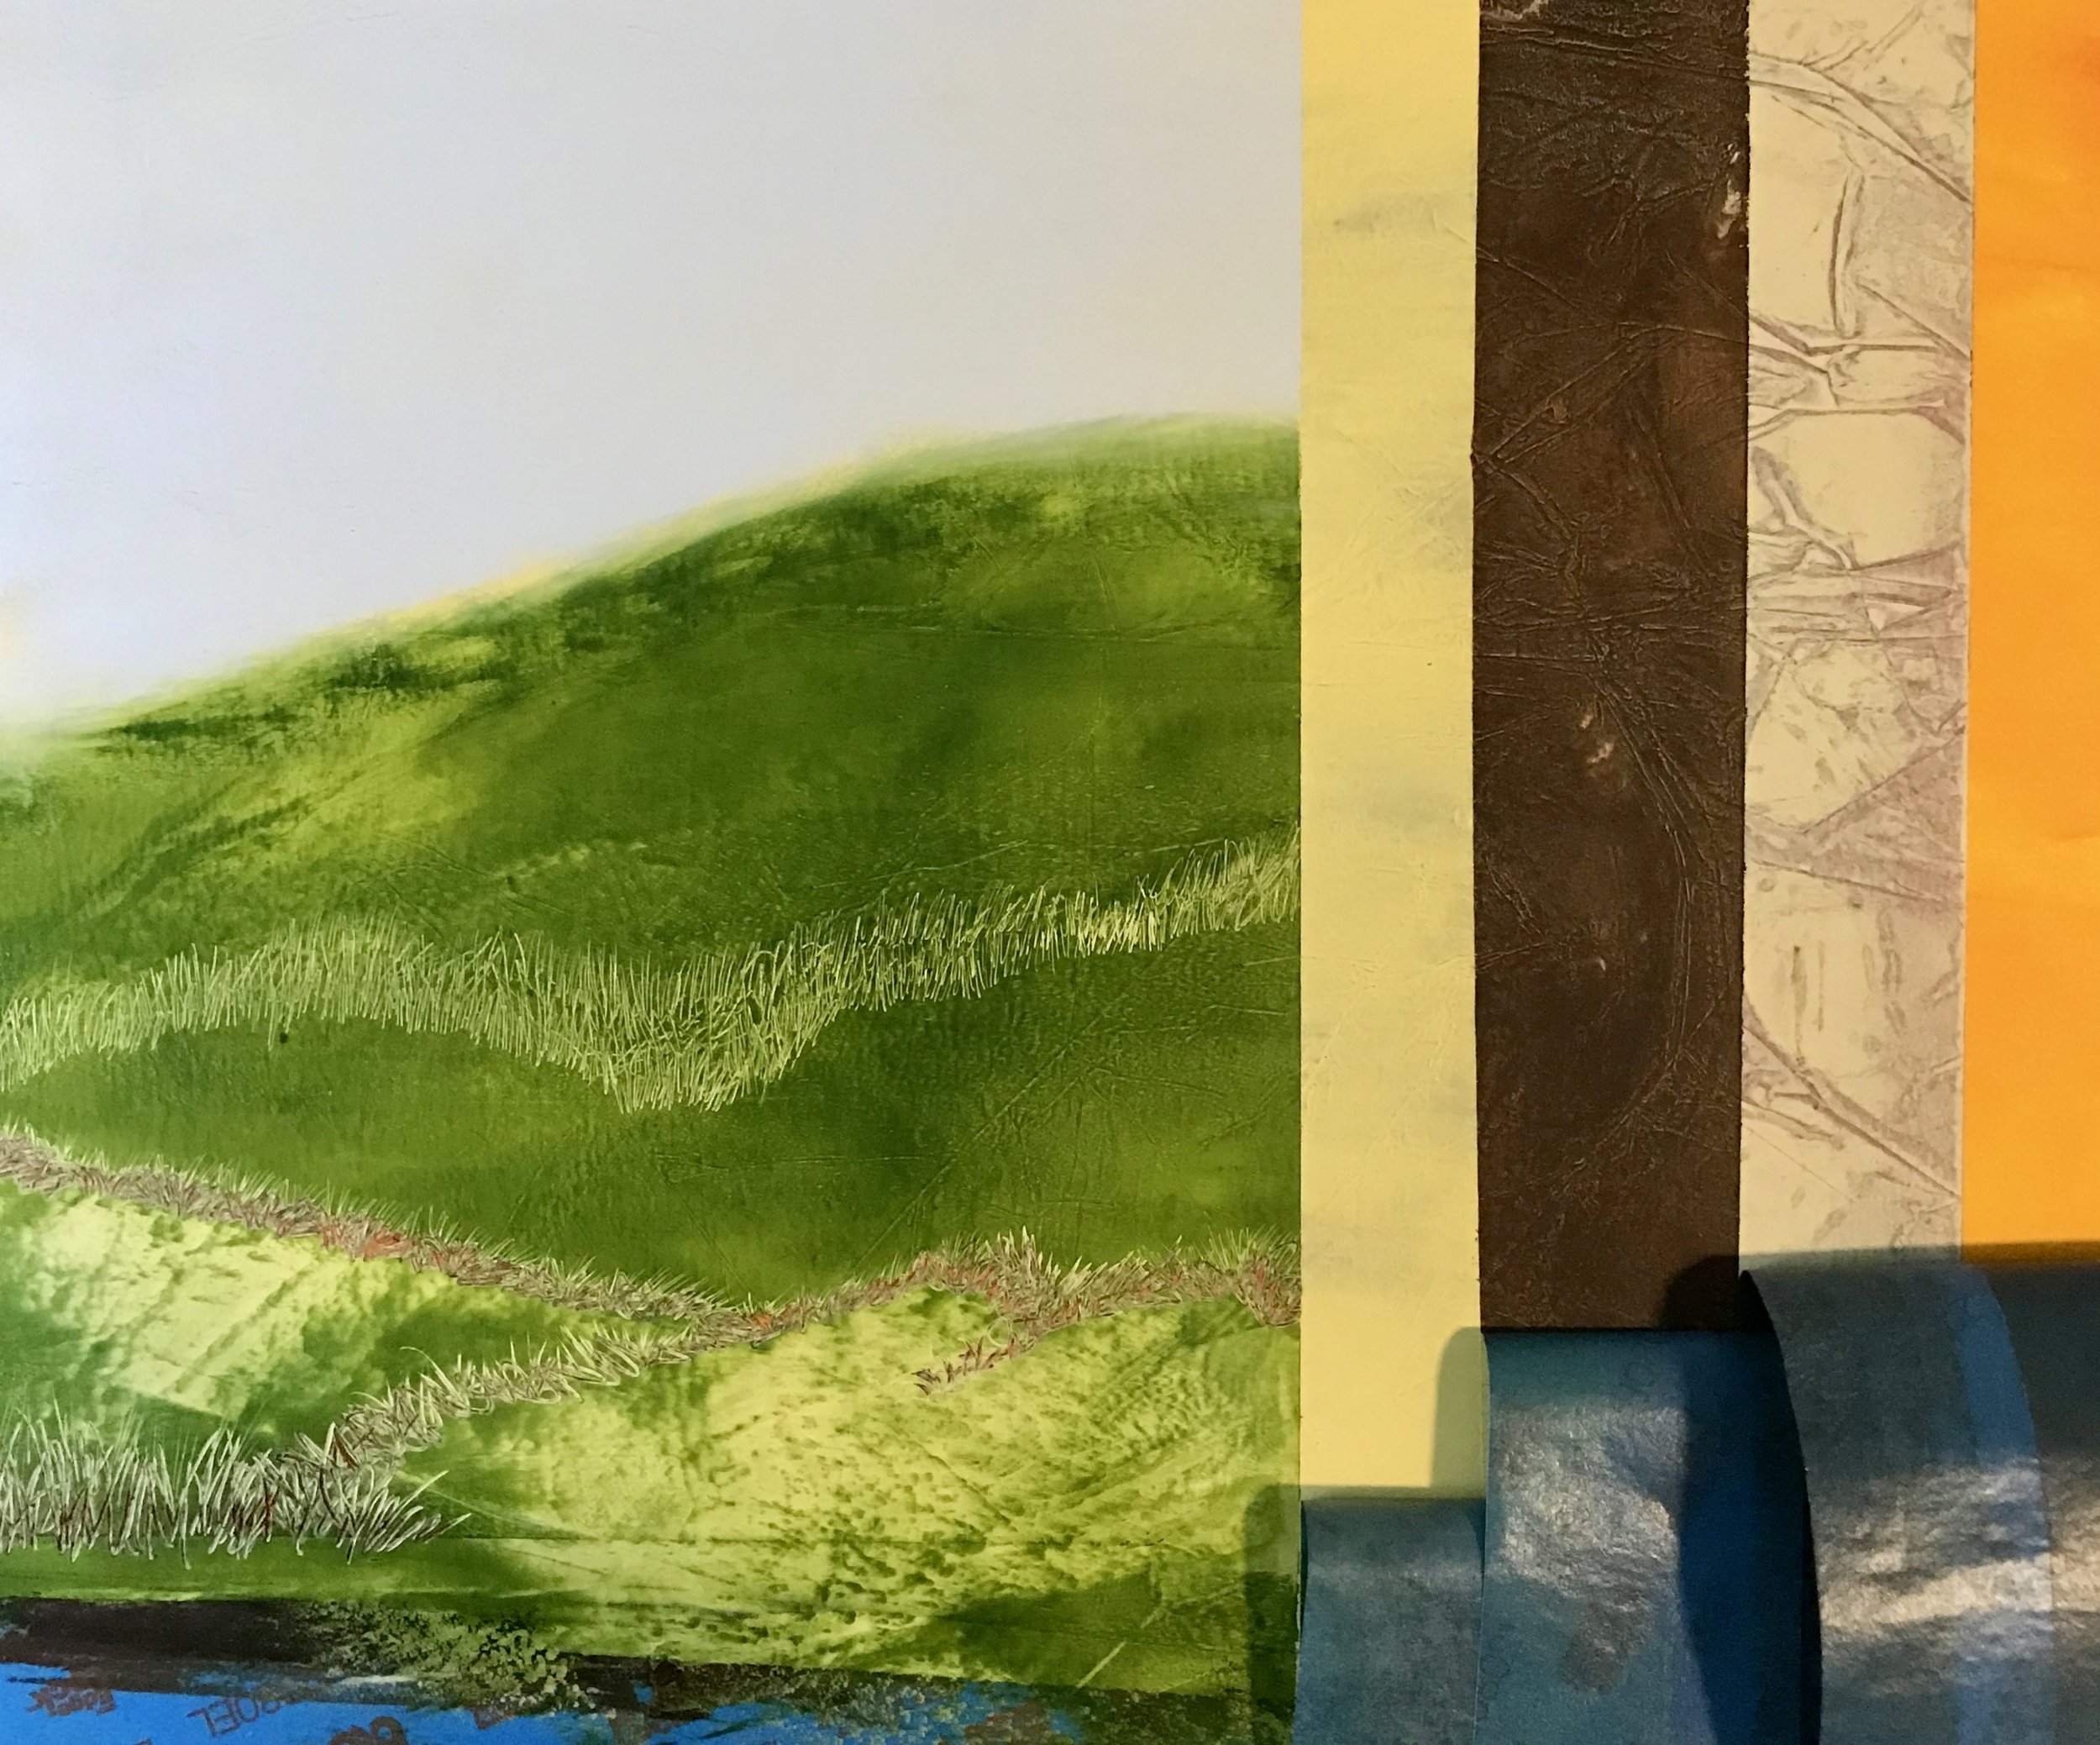
Creating an example that I could use when explaining my painting process was one of my goals for the Plank Road Artist Residency at the Farwell House. I'm definitely making progress on this painting on paper. After laying down each layer, I let it dry and then cover a section with tape. In the image above, the yellow/gold on the far right is the first layer. There actually was a layer of burnt sienna, a rusty red, over the yellow and before the warm white and texture. I'll go back to reapply that later. I was too eager, that layer was too tacky when I applied the tape, and it lifted right off.
When I talk about process, I mention creating depth and texture in my paintings. In the most recent layer shown here, after I applied a layer of transparent sap green and a light blue to create the idea of a simple landscape, I scraped off areas of the green and scratched into the surface with various pressures to reveal different layers from underneath. I plan to add some thin glazes that will further emphasize the textures. I'm not sure what else will come, but I'll post updates here or on my Instagram and Facebook feeds.
I'm hoping that once completed, this tool will help people understand what lies underneath so they have a better appreciation of the completed painting.


